STEM Activities
 Artistic Adventures
 Playful Learning
 The Recipe Repository
  Nature Explorations


 Save PDF
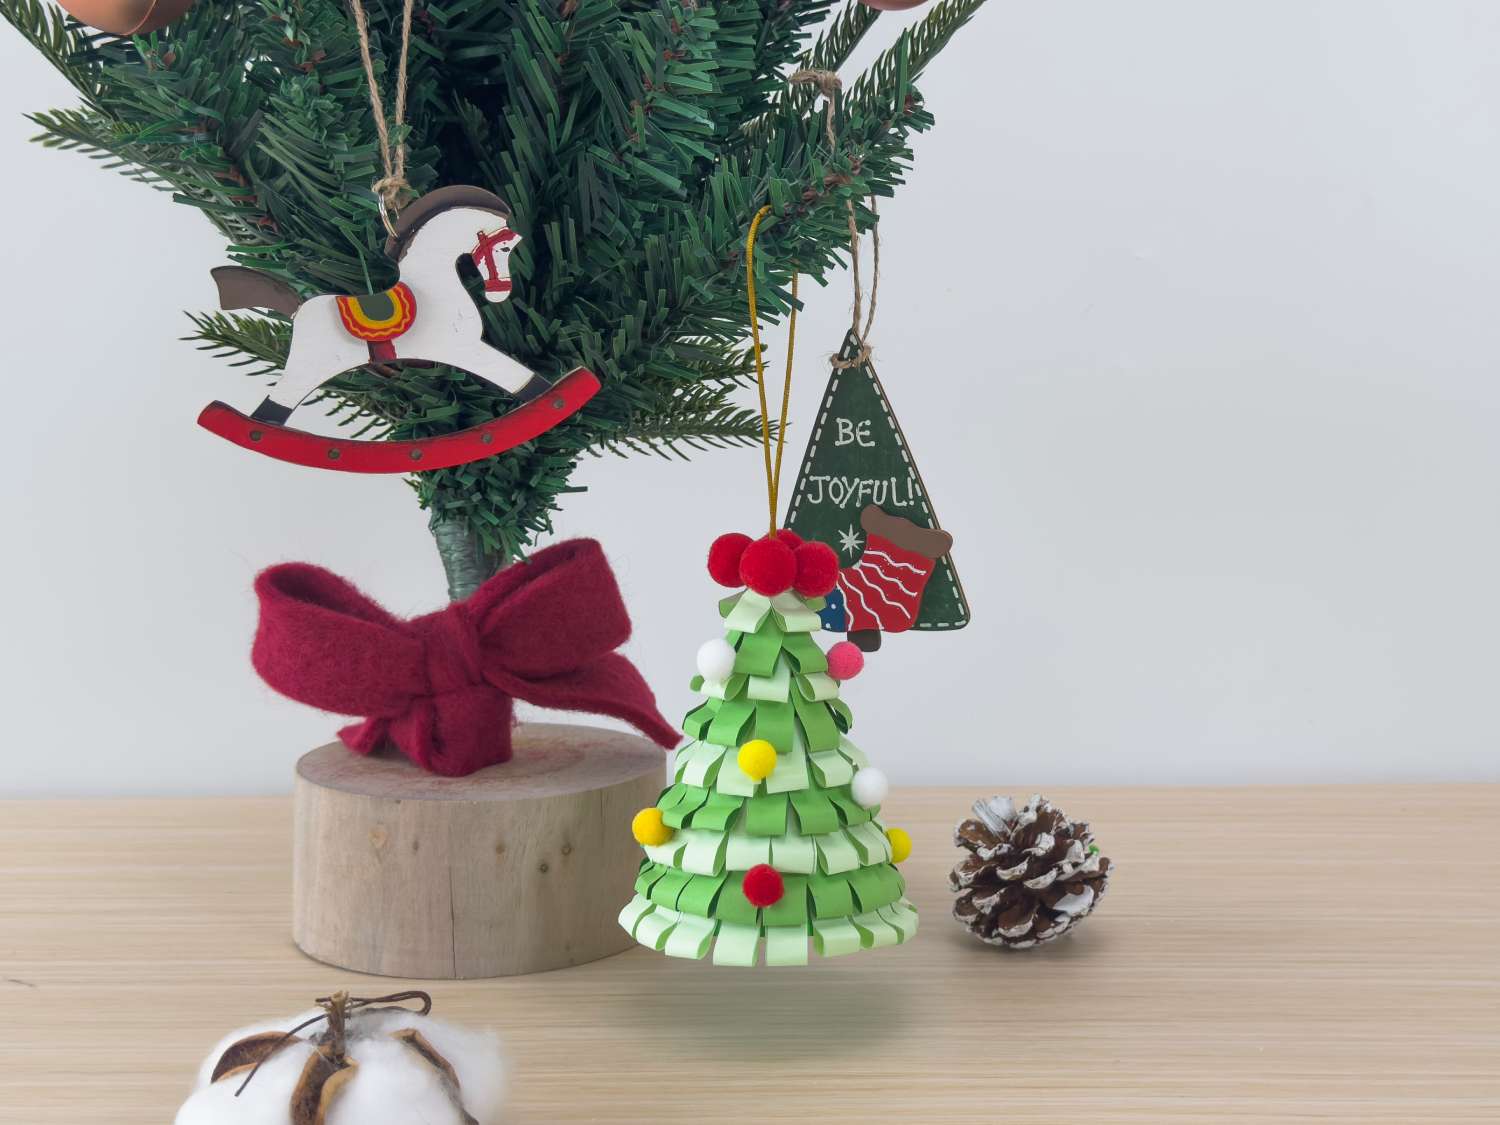
Who could resist having another Christmas tree in their home? This charming Christmas tree craft will test children's patience, but they'll feel incredibly proud when they complete it.
Materials Needed
- Two sheets of dark green card
- One sheet of light green card
- Pompoms
- Double-sided tape
- Bell
- Scissors
- Pencil
- String
- Ruler

Step-by-step tutorial
Take a sheet of dark green card and attach double-sided tape as shown in the diagram.

Starting from roughly the middle of the long edge, roll the card inwards to form a cone shape, gently pressing to secure the double-sided tape.

Using a ruler, measure 10cm from the cone's tip as shown, and mark with a pencil.

Using scissors, carefully cut around the cone at the marked point to remove the bottom half, trying to keep the bottom edge as even as possible. Please be careful with scissors.

Take the remaining two sheets of card. On the longer edge, measure 12 cm and make guidelines every 4 cm. Then, as shown, make horizontal guide lines every 1 cm from top to bottom.

Cut along the guide lines to create strips measuring 1cm × 4cm.

Bend the strips and secure with double-sided tape as shown, being careful not to fold the bottom.

Attach the bent strips around the cone's base, starting 1cm up from the bottom. Create the first layer using strips of the same colour.

Continue attaching layers of different coloured strips every 1cm up the cone. Your basic Christmas tree is now complete!

Measure and cut a 40cm length of string.

Cut off the very tip of the Christmas tree.

Thread the 40cm string through the hole you've just made. On the inside end, thread the bell onto the string. Fold the end of the string and tie a knot 3cm from the end to secure the bell.

Pull the unknotted end of the string up through the top until the inside knot sits against the tree's top. Fold this outer string against the tree top and tie a knot.

Trim any excess string.

You can decorate your Christmas tree by attaching colourful pom poms.

Who Are We?
We’re a passionate team of scientists, engineers, and educators dedicated to delivering hands-on fun. Our mission is to inspire creativity and confidence in the next generation of young innovators.
Sign up and receive DIY inspirations straight to your inbox!
Plus! Enjoy FREE learning resources, exciting lucky draws, and seasonal freebies from us

Featured Products


 Over a thousand
projects
designed,
Over a thousand
projects
designed,  over
ten
thousand materials tested,
over a hundred thousand happy families!
over
ten
thousand materials tested,
over a hundred thousand happy families!